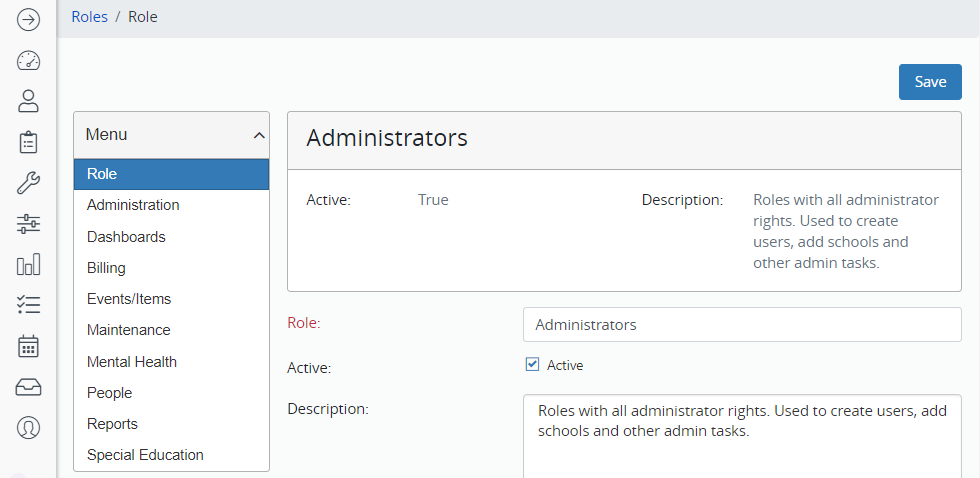
Create a Role
- Click Administration in the Navigation Menu, click Security, and click Roles.
- To search for a created role, enter search criteria and click Search.
- To create a new role, click New.
- Name the Role and check Active.
- A Role Description is optional. It is helpful when there are many similar roles.
- Select all the options that apply to this role. Options include user dashboard elements, the view of the student record, and other features.
- Click Save.
- Several new menus appear on the left. Navigate through each menu to add and remove permissions to the role.
- You must click Save within each menu.

